The Advance Product Variation feature allows you to create flexible combinations of product options. This especially useful for merchants who sell products with multiple attribute such as colour, size, or flavor, where each combination can have its own price and image.
This means you can:
- Offer your customers multiple options for the same product
(e.g. Red+S / Red+M / Blue+L). - Assign a different prices and images for each variation combination.
(e.g. Red+S – RM80 / Black+S – RM100). - Allow customers to easily select and place orders for the variation that suits them best.
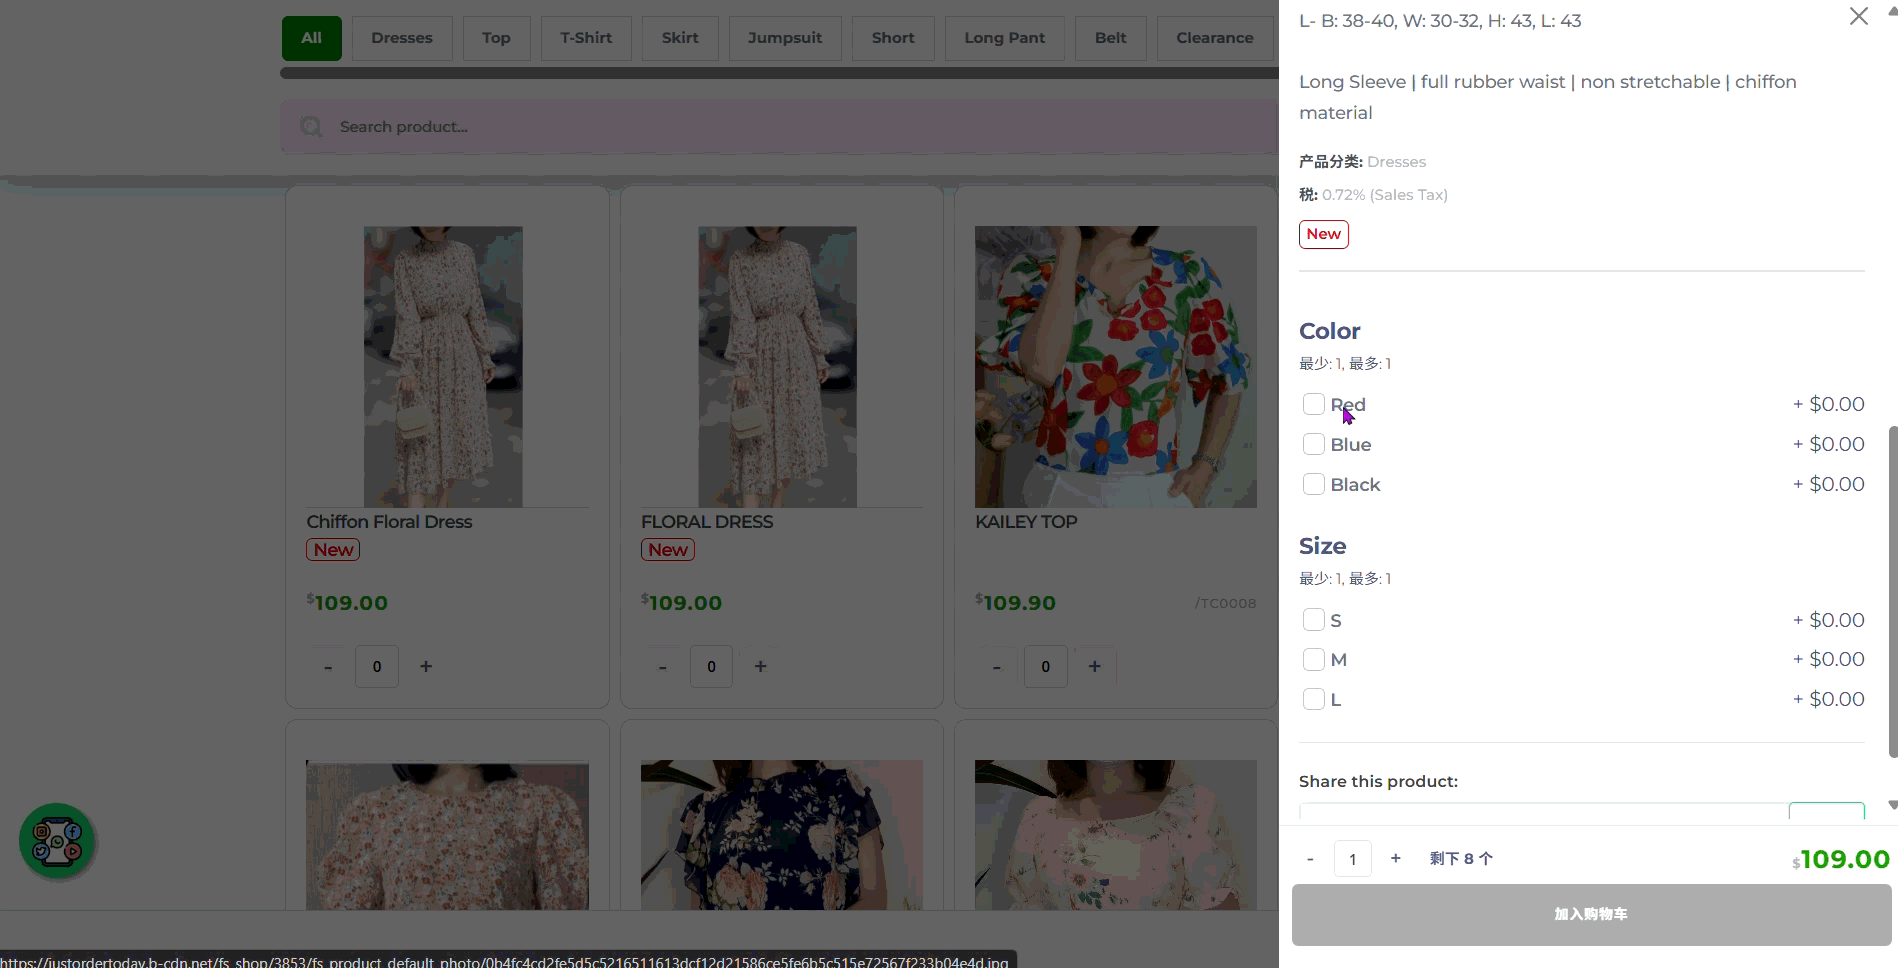
- This feature supports multiple variation combinations (e.g. Size+Color). If you only need to set a single variation, you can use the single option feature instead.
👉 Follow this step-by-step guide to learn how to create a product multiple option combinations with size+color in JustOrder.Today.
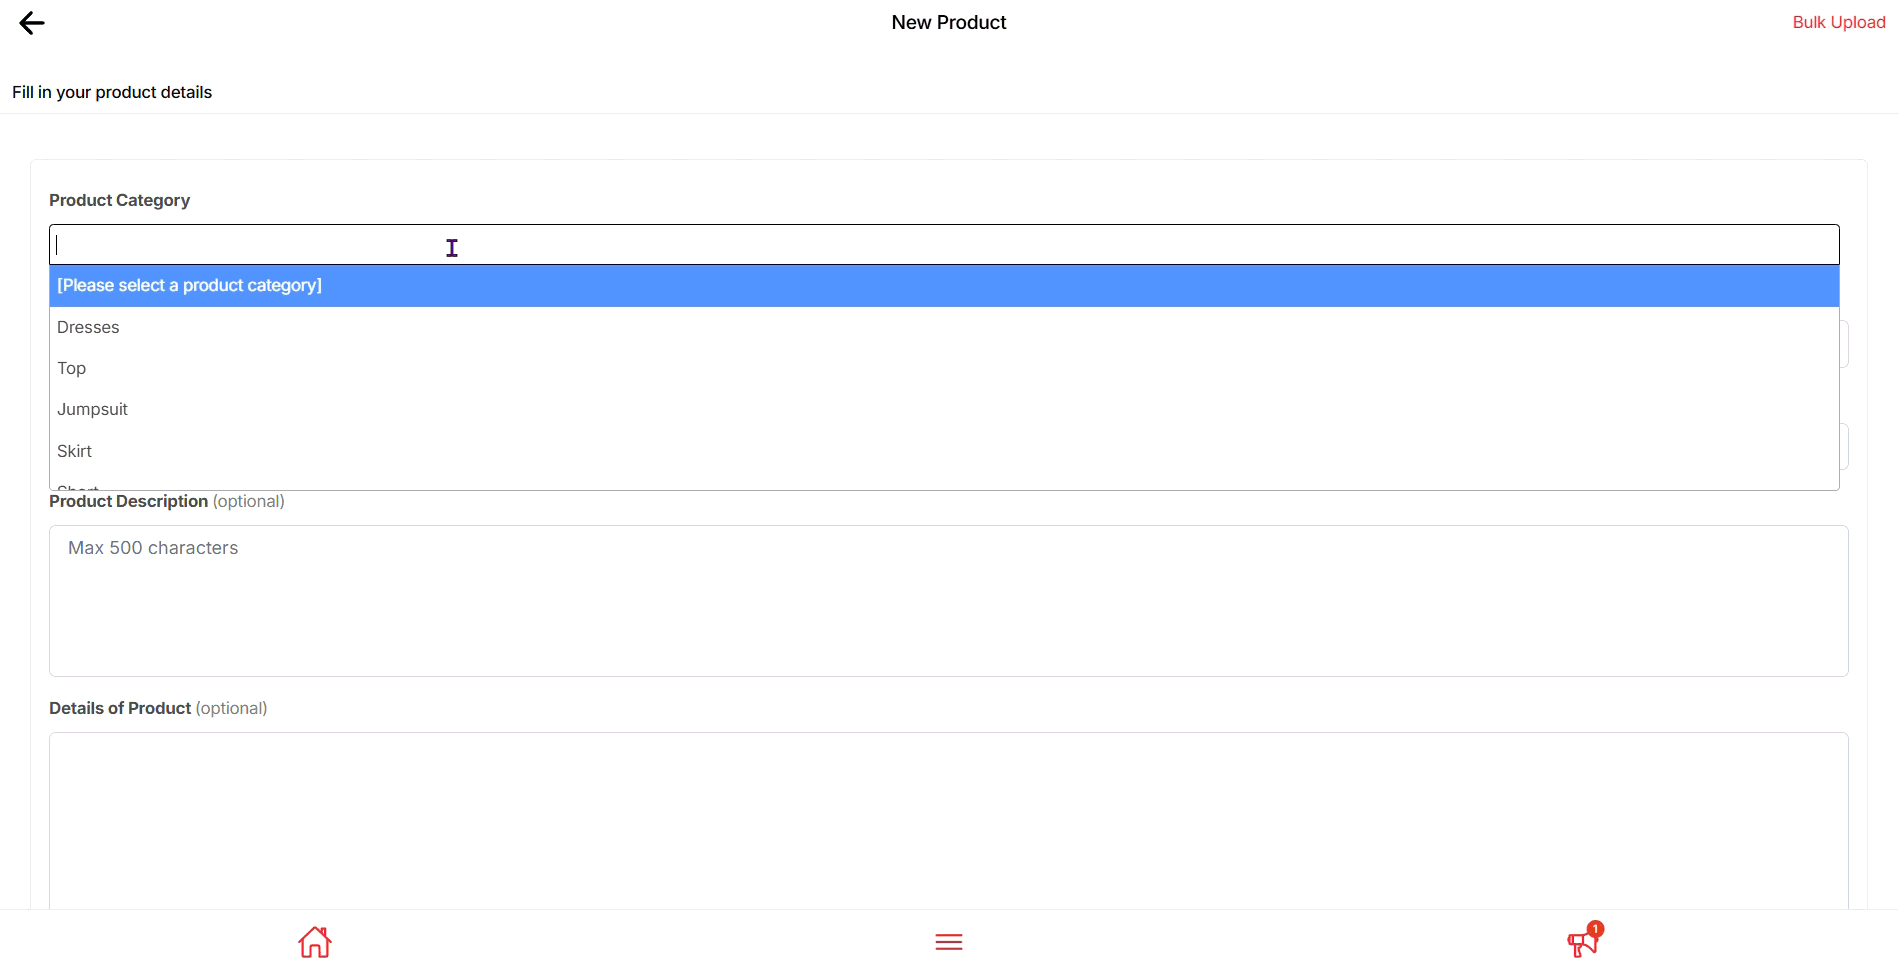
Before You Start: Create a Product Category #
Before adding a new product, make sure you have created at least one Product Category.
This ensures your products are organized and easier for customers to browse.
- From your Shop Dashboard, go to Product Categories.
- Add a new category that matches your product type (e.g., Dress, Top, Jumpsuit).
- Once done, you can proceed to create your product and assign it to the correct category.
💡 Tip: Categories help customers quickly find what they’re looking for and keep your shop tidy.
Step 1: Add a New Product
- From your Shop Dashboard, click on Products.
- Select Add New Product to start creating a new item.
Step 2: Insert Product Name and Description (Leave Default Pricing to “Zero”)
- Enter a Product Name that clearly describes what you’re selling (e.g., Chiffon Floral Dress).
- Add a Product Description with details your customers need to know — such as pattern, size, materials, or any special notes.
- Remain Product Default Pricing as “0”, product price will define by single option setup later.
💡 Tip: Keep your description simple but informative so customers can quickly understand what they’re ordering.
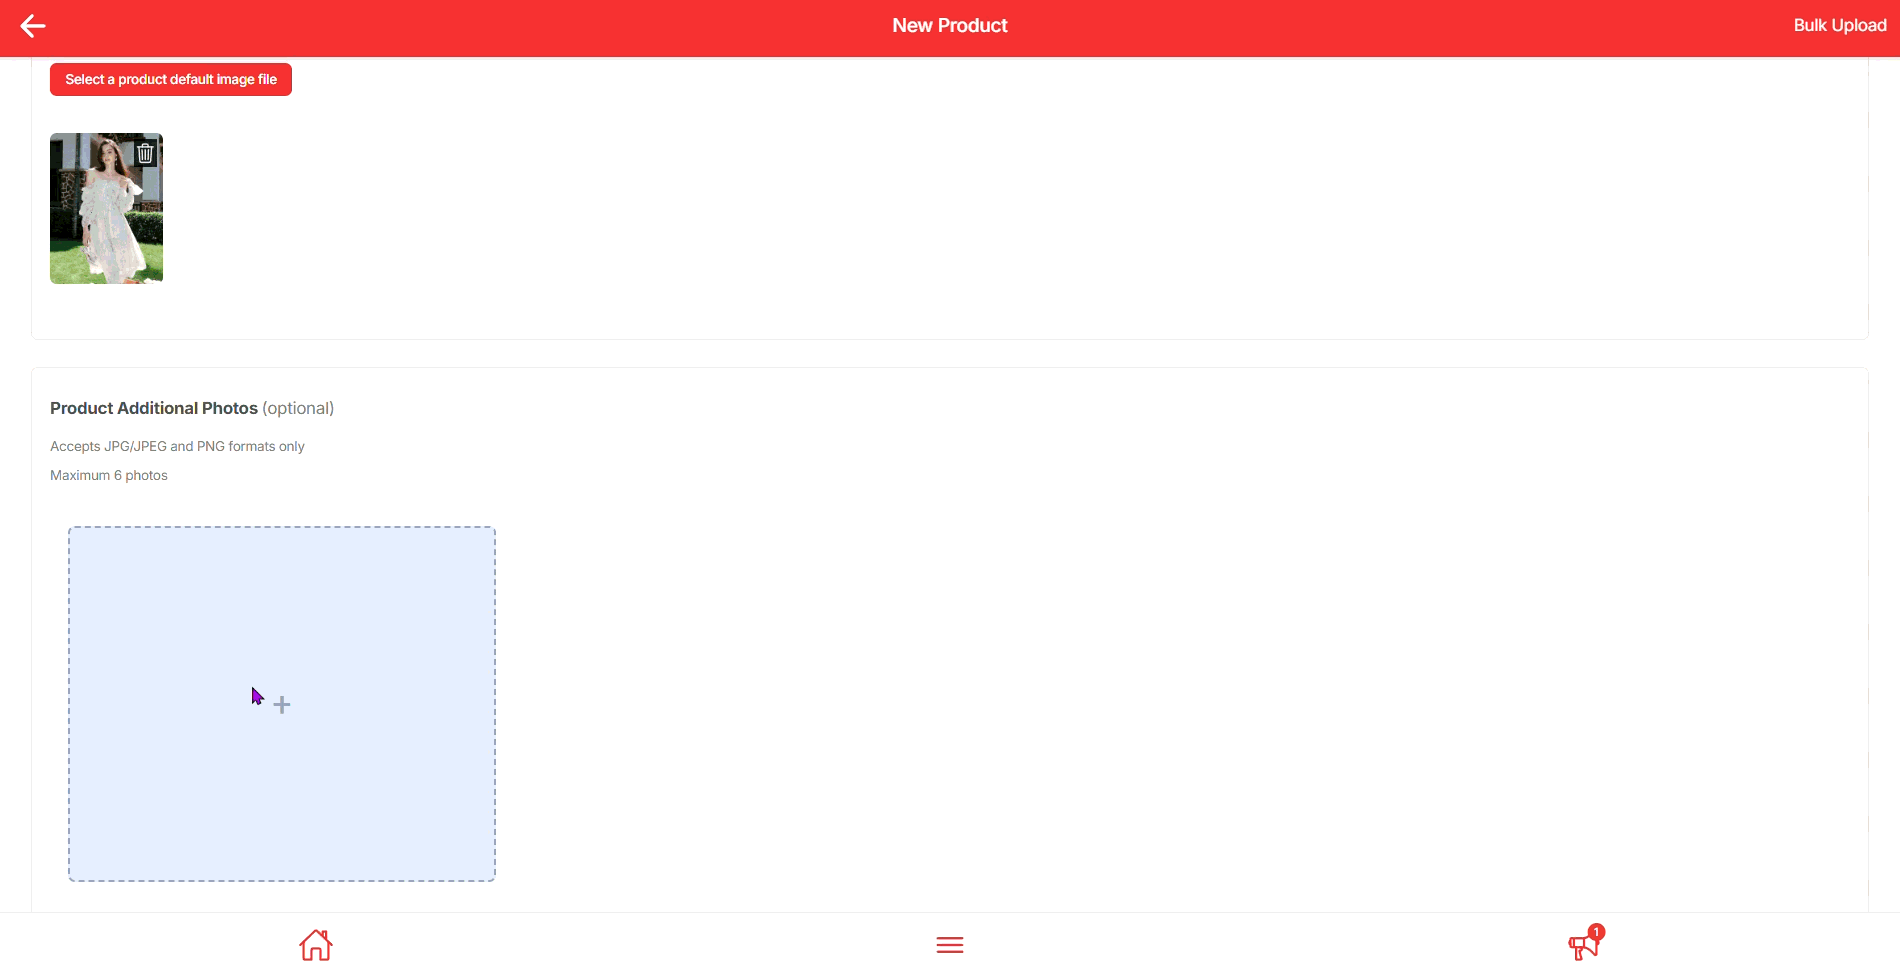
Step 3: Upload Product Default Photo #
- Click Select a product default image file.
- Choose your main product photo (JPG or PNG format).
- This image will be shown as the primary product photo in your shop.
💡 Tip: Use a clear, high-quality photo with good lighting — it helps customers trust your product and improves sales.
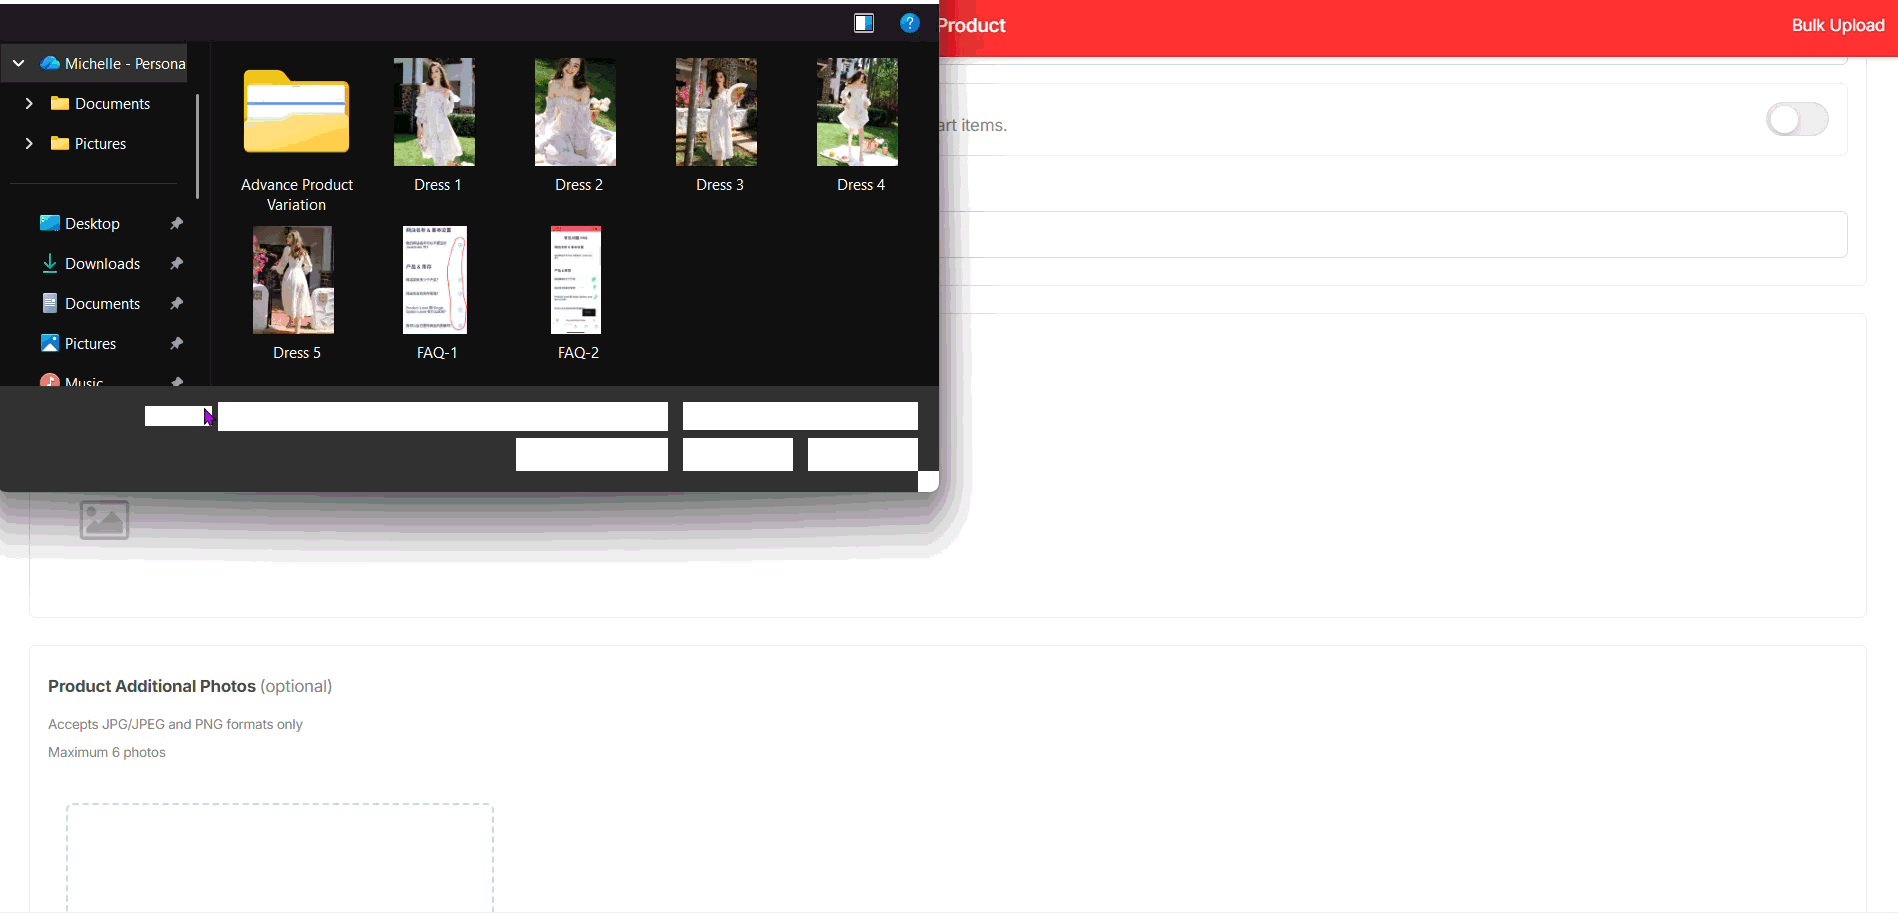
Step 4: Add Product Additional Photos (Optional) #
- Click the “+” icon under Product Additional Photos.
- Upload extra product images (JPG or PNG format).
- You can upload up to 6 photos.
💡 Tip: Use additional photos to show different angles, packaging, or close-up details. The more visual clarity you give, the more confident customers feel when buying.
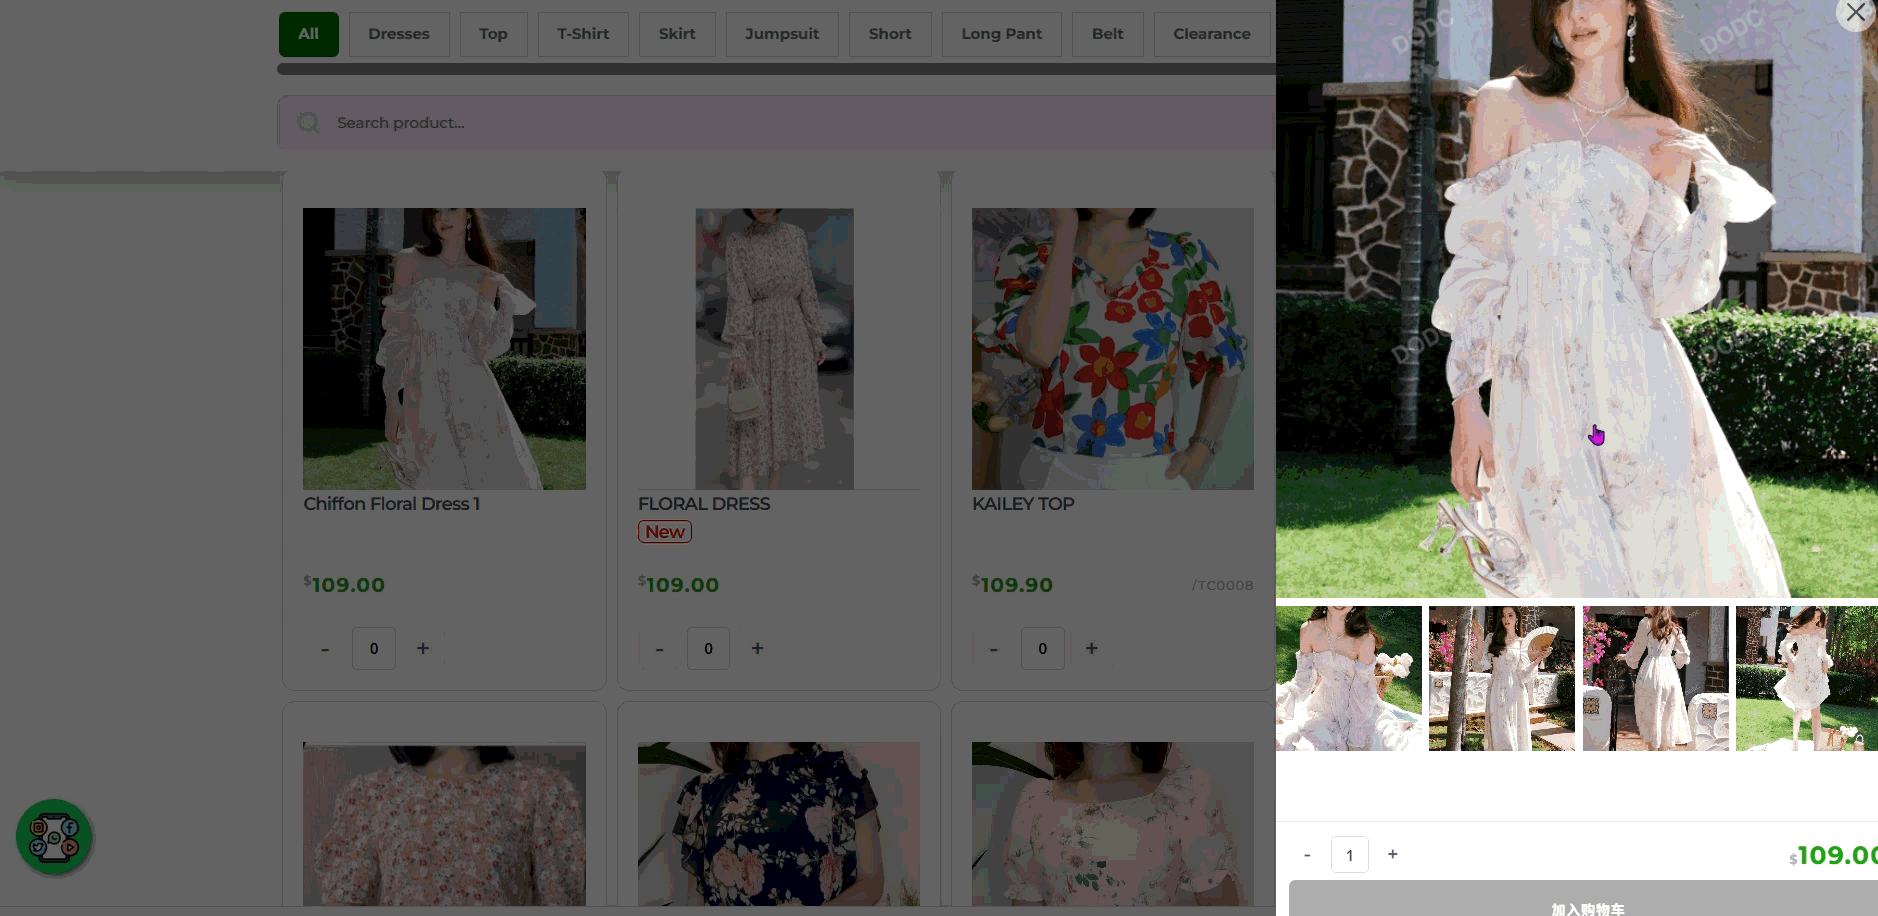
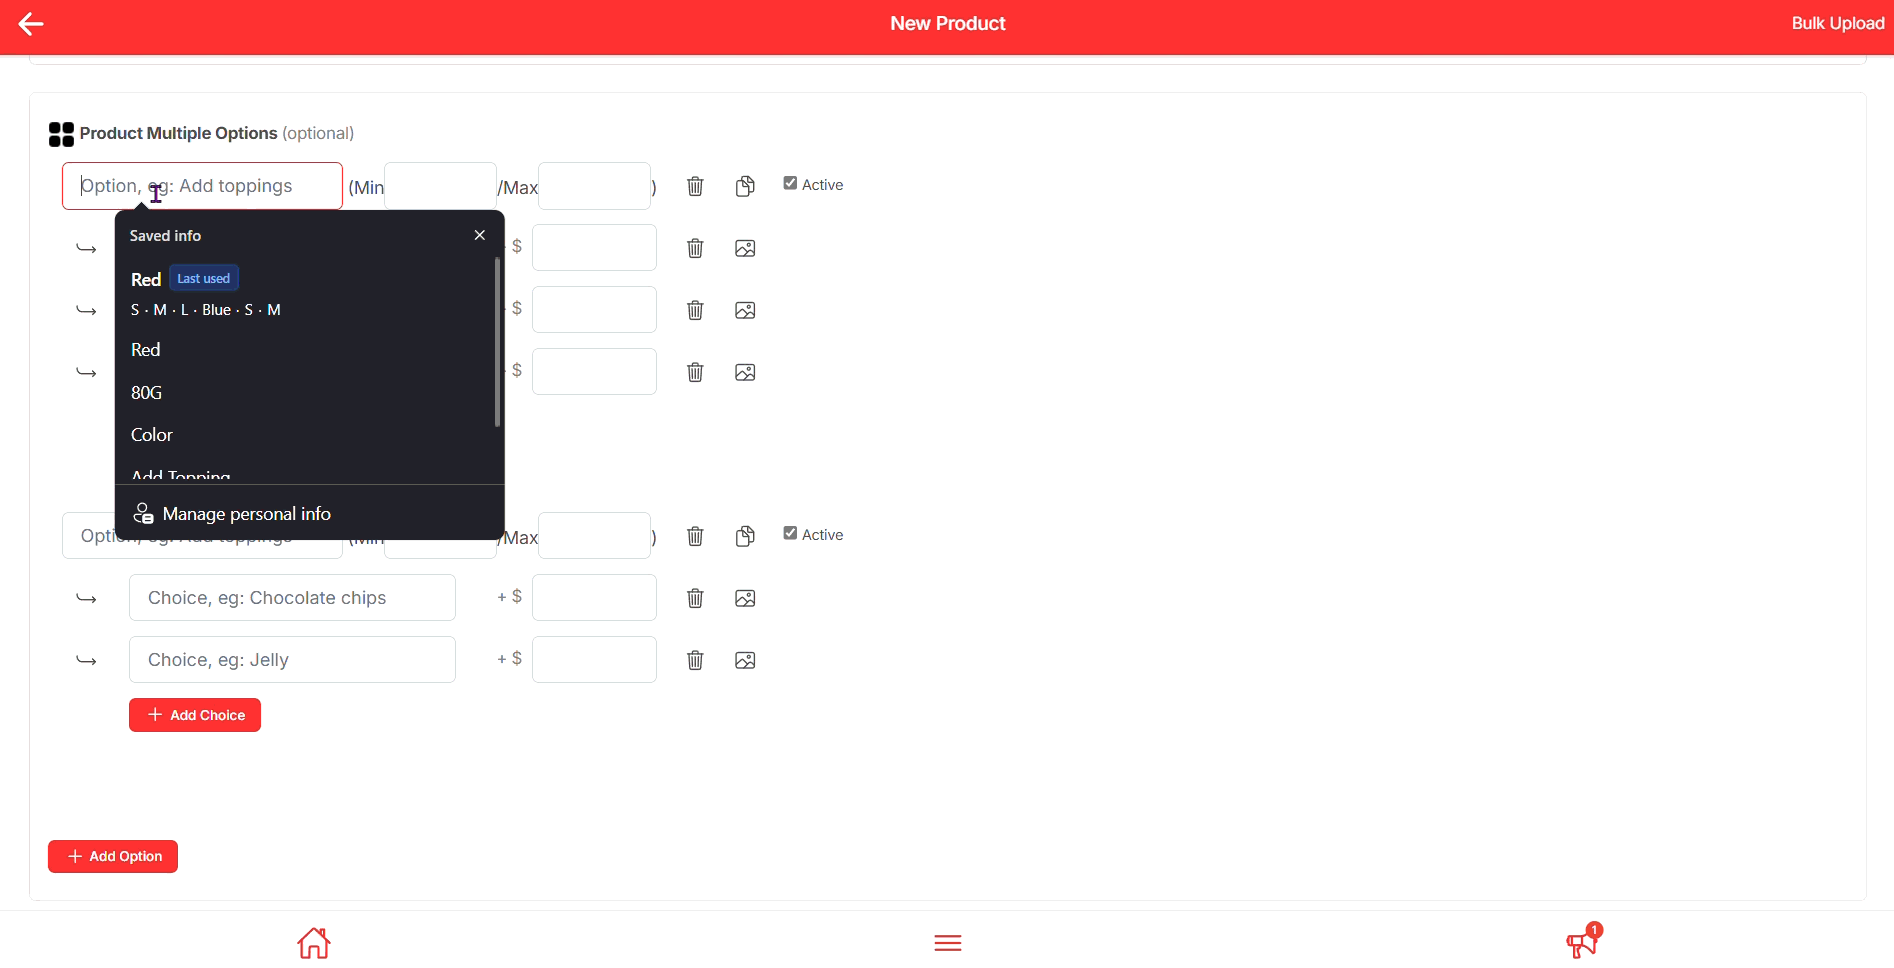
Step 5: Add Multiple Option and Upload Product-Specific Photos #
- Scroll down to Product Multiple Options.
- Click + Add Choice.
- Enter the Option Name + Choice Name (e.g., Color – Red, Blue, Black).
- Upload a specific photo for each choice.
- This image will appear when customers select that option.
- It replaces the default photo in the cart and order summary.
💡 Tip: Multiple options are best for products with combination type of variation — like different color with different size.
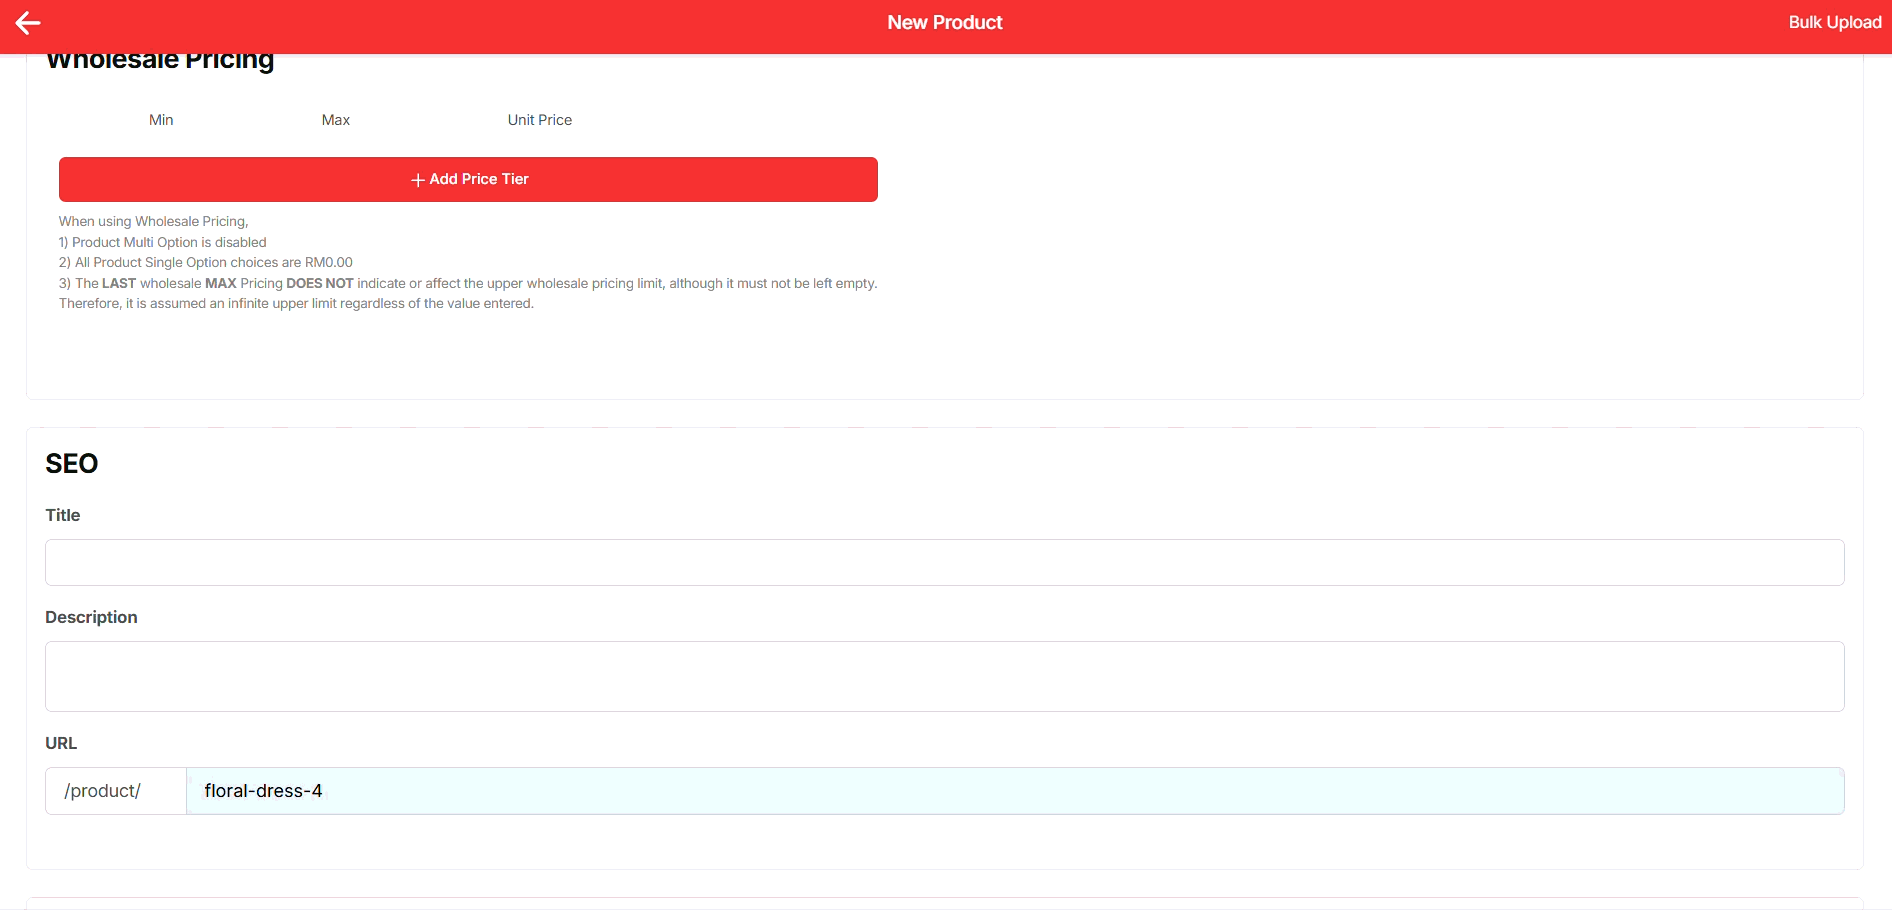
Step 6: Insert SEO Details and Save Product #
- Scroll down to the SEO section.
- Fill in:
- Title – use the product name (clear and keyword-friendly).
- Description – a short summary for search engines (include key product details like colour, size, or category).
- URL Slug – customize if needed (e.g.,
/chiffon-floral-dress).
- Review your Product Tax settings (optional).
- Once everything looks good, click Create Product to save.
💡 Tip: SEO details help your product appear in Google search results and make it easier for new customers to discover your shop.
Final Outcome #
By simply following all the above steps, you will be able to create product with different choice based on different option (e.g. sizes, colours)